A Step-by-Step Guide to Candle Making
- Suzan Baldoumas
- Dec 15, 2023
- 4 min read
Updated: Mar 28

Candle making is a rewarding craft anytime of the year, but especially during the colder months. When the days are shorter, candlemaking is the perfect way to spend an evening at home. Create personalized, aromatic, slowburning candles one at a time in special containers or in batches to give as thoughtful gifts. Below are the supplies and steps needed to create handmade candles.
Supplies:
Wax
Choose a wax type based on your preferences. Popular options include paraffin, soy, beeswax, and gel.
Paraffin is the least expensive option and holds fragrance well. A couple of things to consider, however, is that paraffin is a fast burning wax and not the best option for the environment or for your lungs.
Beeswax is a beautiful slowburning wax and a great choice for a special project or when you don't want to add fragrance to your wax as it naturally has a subtle fragrance of it's own. It can be expensive though so it may not be an ideal choice for making large batches. The candle will last a long time as it will take longer to burn than any other wax so you may decide that it is worth the extra cost.
Gel melts are another more costly but slowburning option. If you want colored candles, this may be the right choice for you as the melts come in a variety of colors. Keep in mind that colored dyes can be added to any type of wax.
Soy wax is my favorite wax to work with, Soybeads are easy to measure, melt quickly and store well. Soy is clean, slow burning, easy to find and less expensive then beeswax or gel.
Wicks
Select a wick that matches the size of your container or mold. Wicks come in different lengths so consider the depths of the containers that you will be using before purchasing wicks. Pre-tabbed wicks with sustainers are convenient for beginners. I like to use a bit of hot glue to secure it to the bottom of the candle container. You may want to add multiple wicks if your container is large. Check the packaging to be sure the wicks are prewaxed. This will make them a bit stiff and easier to manage as you pour the wax.
Fragrance
Add Essential Oils, Fragrance Oils or Natural ingredients such as orange peel, pine and lavender to your candles. While I love the look of the natural elements mixed into candles, the fragrance is very slight. Essential oils can be expensive and you will need to use quite a bit ( about 1/2 bottle for a medium sized candle) to get results. If you really like a fragrant candle, your best bet is to purchase fragrance oils meant for soaps, lotions and candles.
Double Boiler or Two Pots
Candy Thermometer
It is critical that the wax does not get too hot but it also must be hot enough
for a proper pour.
Stirring Utensil
A simple stir stick or spoon will suffice.
Container or Mold
This is truly unlimited. The most obvious choice is a glass jar, repursed or new, There are many more options, however. Look around your home. What kinds of empty vessels do you have that could be to used? A beautiful piece of pottery (even something unique made by a child in art class) a wooden bowl, a vase, an old tin, anything that can handle the heat of the wax and is leakproof. I highly recommend filling any containers that you might want to use with water just to be sure that there are no small holes or cracks.
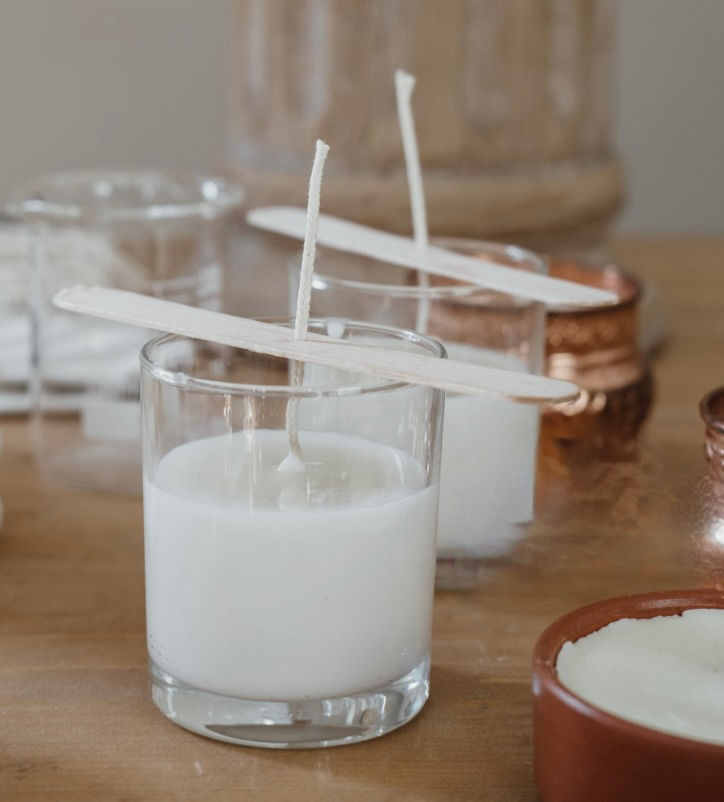
Wick Holder
Chopsticks, pencils or popsicles work well to keep the wick centered during pouring. Just wrap the wick around the holder and balance the holder on the container until the wax is set.
Steps
Prepare
Start by covering your work surface to protect it from wax spills which can be difficult to remove. Parchment or wax paper works well. If you think that you will want to move your candles before they have set, use trays to hold the containers.
Secure the Wicks
Secure the wick at the bottom of the container or mold using a small amount of glue from a hot glue gun. If you do not have a glue gun, you can wait until you have some melted wax and use that. Wrap the excess around a wick holder to keep the wick stay centered.
Measuring the Wax
You will melt the wax by using a double boiler or two pots. Start by boiling the water in the bottom pot. Once it has boiled, turn the temperature down low. Place the thermometer in the top pot and add the wax. There are formulas and charts available online that are designed to help you figure out percisely how much wax you will need to melt based on the size of your container. I don't use them, however. I prefer to tweak as I go. The most important thing to know is that it takes more wax to equal the same amount of weight in water. Wax weighs 20% less than water. With this in mind, I add about 20% more soybeads to my melting pot than the size of my containers. If you begin to run out of wax as you pour, simply stop and add more beads to your melted wax. This is another reason that I enjoy using soybeads. You can just drop more in the hotwax and they will melt quickly.
Do not leave your melting wax unattended Heat the wax to 180°F - 185°F while stirring. The wax will become clear. Turn off the heat and allow the wax to cool to 160°F. Add the fragrance. If you like the fragrance strength of store bought candles, I recommend doubling the number of drops suggested on the fragrance bottle.

Carefully pour the melted wax into the prepared container or mold. Leave some space at the top.
Allow the candle to cool and harden completely. Trim the wick to about half an inch above the surface of the wax.
Experiment with different scents, colors, and container styles to create unique candles that reflect your personal style. You may find that you love using a certain type of wax, fragrance or container. Maybe you will add dried herbs, flowers or fruit to your candles. Experiment and have fun!
Want an even easier way to try this project? This beginner candle-making kit includes everything you need and the wax melts right in the microwave.


Comments